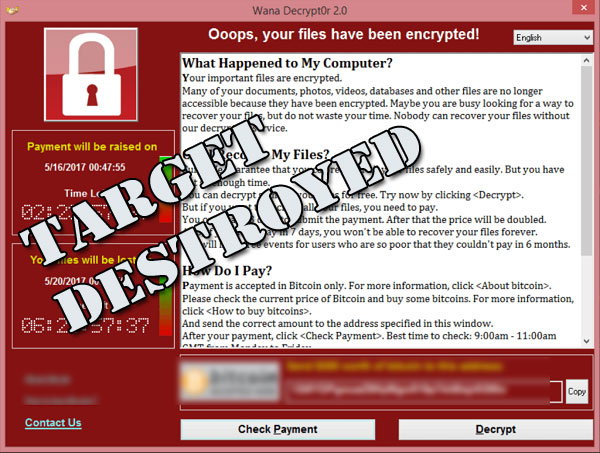
The world witnessed a massive cyber attack on 12th May 2017 – specifically known as WannaCry Ransomware which encrypted files in over 225,000 computers worldwide. It was based on EternalBlue exploit of Windows OS implementation of Server Message Block (SMB protocol). The vulnerability was first ‘discovered’ by NSA and Microsoft released a security patch in March itself. It spread like a wildfire but collected comparatively little money in Bitcoin for the perps. It looked like a dryrun for an eventual assault on computers in specific targeted countries.
There is no reason to conclude that such assaults on the Windows system would be self limiting as it happened in this case in future. It stands to reason that unless you take all due diligence in securing your computers, you might find your computers rendered useless at any time.
Protection of your system hinges on how you treat your system. No amount of Anti-virus, anti-Malware software is going to replace a well designed proactive plan to secure your system. This article is borne out of decades of years of experience in securing computers.
1. Periodic Backup : Depending upon the usage, create a backup at least everyday. If your files are mission critical, it is essential to have monthly, weekly and daily backups.
When you use a backup, make sure that the backup is read only. Other things being equal, I would choose a Linux file server for one of the backups. Linux provides several options to lock down using a combination of permissions and mounting. This way we can ensure that once the backup is created, it can’t be written again preventing data corruption.
2. Ensure that the OS and the software you are running are current and patched. If you are using Windows – make sure that at least Windows Defender is enabled and active. if you are on Windows 10, make sure that the service Windows Update is set to automatic and not disabled. Many power users disable this to prevent undue latency. Windows Defender will not update its virus database if this service is disabled.
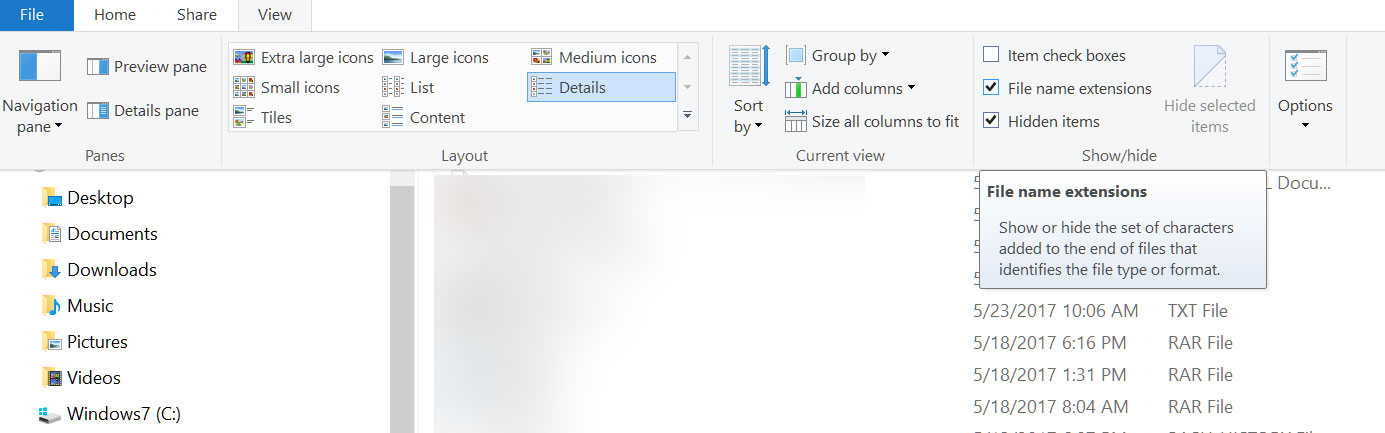
3. There is a saying in the espionage industry – ‘Trust No one’. It applies to us as well. Things are not what they seem. If you are on Windows, take the first step of checking file extensions from Windows Explorer. Windows tries to hide the file extension in a default installation. You need to enable it to view file extensions. This helps you see if a file masquerades as a document file with the extension of .doc while it has a real extension of .exe: sinister.doc.exe
Whilst at it check the type column for probable file type as what Windows thinks. Don’t take the word of Windows for it.
Do Not count on email service providers to check your email attachments for Malware. There are dozens of Malware masquerading as genuine attachments which can pass the peremptory scrutiny of the generic anti virus software of the email service providers. Make a mental note to delete a mail as per the rules below:
Rule 1 : If it purportedly comes from people you know – when they have no need to attach any attachments.
Rule 2: If it purportedly comes from some celebrities. It may temporarily boost your ego to get mails from Celebrities, but chances are they don’t know about you and the mails actually come from hackers who use social signals to smuggle in their nefarious payloads. I have been getting ‘mails’ from all – from the Pope himself down to the President of the US.
Use a separate computer for potentially dangerous activities: -like checking emails, browsing unknown sites, socializing activities. Before you do all that, make a clone of the OS and store the disk separately. Every few days, just purge the existing OS from this computer and recreate the OS from the clone. This computer has no privilege to connect to the main computers. If affected by any Malware or virus, it can’t spread to other computers.
If you have only one computer that needs to multitask, create a Virtualbox and install a Windows in the Virtualbox. Once the Virtualboxed Windows is working as per your needs, copy the .ova file in a separate directory. You can purge the existing Virtualboxed windows at regular intervals and recreate another instance from the .ova file.
This way you have a Sandboxed computer that can’t mess up your precious regular Windows. Remember – a really Secure Computer has no connection to outside world.