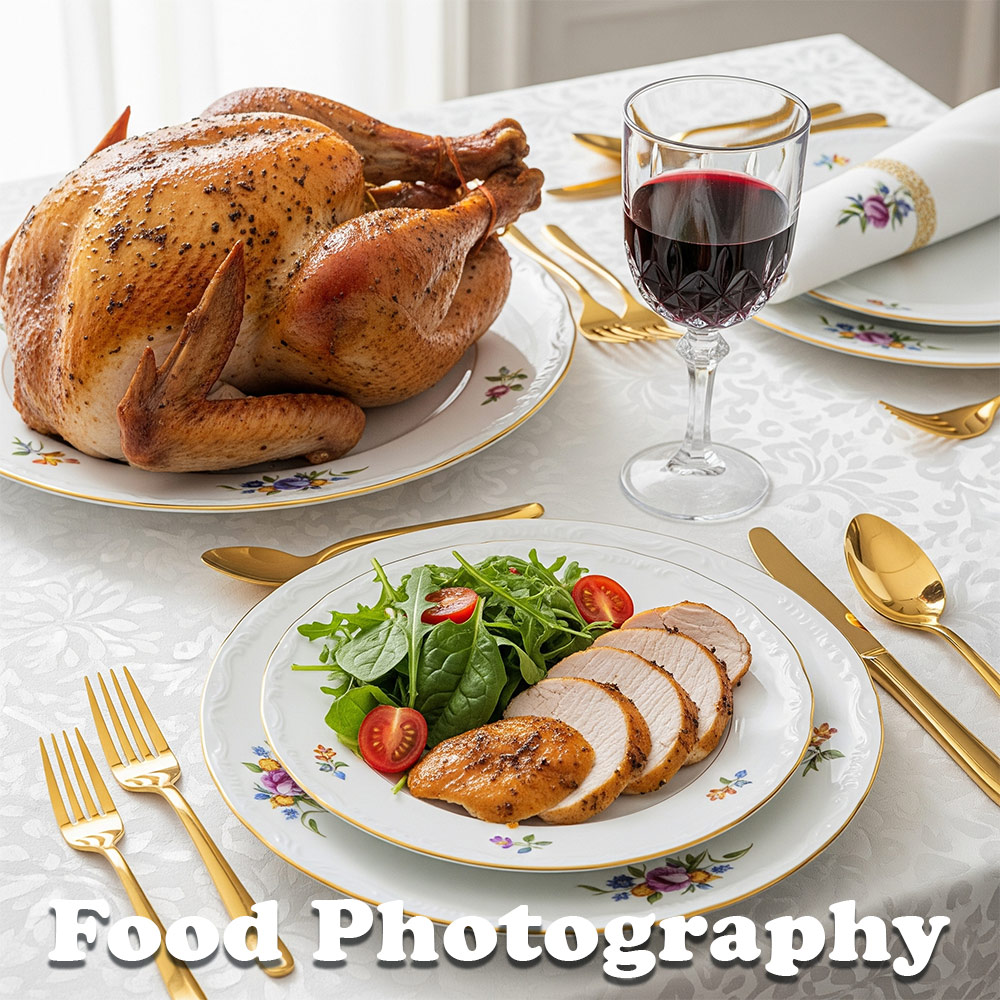
Mastering iPhone Food Photography
Unlock the art of capturing mouthwatering food photos on your iPhone! Whether you’re a culinary enthusiast, food blogger, or simply someone who loves sharing meals with friends and family, ‘Mastering iPhone Food Photography’ is the ultimate guide to take your photography skills to new heights. Although we say iPhone photography, this article is equally applicable for all mobile phone photography.
Beyond raw quality, the iPhone’s portability and intuitive interface make it an unparalleled tool for spontaneous capture, social media content creation, and even independent film making, transforming what was once a complex, equipment-heavy craft into an accessible art form driven by the powerful computational photography and video processing within a device that fits in your pocket. I wanted to cover a lot of ground on Mobile Photography which is extensive here. So I have not included Mobile Videography as it would become too long. We will cover Mobile Video in a separate article.
With our expert tips, tricks, and techniques, you’ll learn how to transform your kitchen into a photo studio, where every bite becomes a feast for the eyes. From mastering lighting and composition to editing and styling, this comprehensive resource will inspire you to create visually stunning images that showcase your culinary creations in all their glory.
For well over 3 decades, I have dabbled in Photography and Videography. In the earlier days I had to lug Video cameras like Arnold Schwarzenegger lugging a huge lumber over his mighty shoulder in the movie Commando. They were bulky, needed bright lights, reflectors to capture images for posterity. It was a different era. Now you have your iPhone which weighs barely 200 gm and yet captures high resolution images under most lighting conditions. It would have been almost a Vatican certified miracle if not for the fact that I’ve had the privilege of witnessing this metamorphosis firsthand.

Just like in your cooking, it is all a matter of the right ingredients and at the right proportion. Let us get down to the meat of the matter now:
Harnessing the Power of Natural Light
In the age of Instagram and mobile-first content, food photography is no longer just for professionals with DSLRs. If you have an iPhone, you already hold a powerful tool capable of capturing mouth-watering food shots. But the secret ingredient to taking stunning food photos ? Natural lighting.
Let’s explore how to use natural light effectively and elevate your iPhone food photography game.
Why Natural Light Is Your Best Friend
Natural light is soft, flattering, and brings out the true colors and textures of your food. Unlike artificial lights, it doesn’t cast harsh shadows or distort the hues of your dish. Whether you’re shooting a frothy latte, a colorful salad, or a gooey dessert, natural light can make your food look fresh, appetizing, and vibrant.
Best Times for Food Photography
- Morning Light (8–11 AM): Cool and soft. Great for lighter, breakfast-style shots.
- Late Afternoon (3–5 PM): Warm and golden. Perfect for rich and hearty dishes.
- Cloudy Days: Surprisingly great. Clouds diffuse the sunlight and create an even, shadow-free lighting environment.
Ideal Locations to Use Natural Light
-
- Near a window: The go-to spot. A north-facing window offers consistent, cool light throughout the day.
- Open doorways: Great for directional lighting.
- Outdoors in the shade: Avoid direct sunlight, which can be too harsh. A shaded area offers bright, diffused light.

Tip: Turn off all artificial lights when using natural light. Mixing light sources can lead to color imbalance.
iPhone Settings and Tricks to Enhance Natural Light
- Tap to focus and expose: Tap on the brightest part of your food. Then drag up or down to adjust the exposure manually.
- Use Portrait Mode (with caution): Works great for isolating the subject, but make sure the blur doesn’t ruin food texture.
- Turn off flash: Always. Flash introduces unwanted shadows and flattens the image.
- Use the grid: Go to Settings -> Camera -> Enable ‘Grid.’ This helps align your shot and apply the rule of thirds.
- Shoot in Live or RAW (if available): Gives you more control in post-editing with apps like Lightroom or Snapseed.
Simple Props and Backgrounds That Work Well in Natural Light
- Light-colored backgrounds like white marble, linen, or wood.
- Neutral props that don’t compete with the food.
- Reflectors (even white paper or a napkin) placed opposite the light source to soften shadows.
Pro Tip: Use Backlighting or Side lighting
- Backlighting (light comes from behind the food): Great for translucent foods like drinks, soups, or jellies.
- Side lighting (light comes from one side): Highlights texture and creates depth perfect for baked goods or layered dishes.
1. Top-Down (Overhead) – 90°
- Best for: Flat lays, tablescapes, pizzas, salads, spreads.
- Why it works: Shows symmetry, color, and arrangement clearly.
- Tip: Keep everything neat and styled. Use the grid for balance.
2. Straight On – 0°
- Best for: Layered cakes, burgers, drinks in glasses.
- Why it works: Emphasizes height and layers.
- Tip: Use a clean background or props that add depth.
3. 45-Degree Angle
- Best for: Most plated dishes it’s how we typically see food when seated.
- Why it works: Combines a sense of depth with a clear view of the top and sides.
- Tip: Use this angle for a more natural, relatable look.
4. Close-Up / Macro
- Best for: Details melting cheese, frothy coffee, icing texture.
- Why it works: Brings focus to texture and emotion.
- Tip: Use Portrait Mode or tap to focus and manually lower the exposure slightly.
Bonus: Experiment and Move Around
- Try different angles for the same dish.
- Sometimes a shot looks best at an unexpected perspective.
Final Thoughts
In photography, the terms “landscape” and “portrait” modes refer to the camera’s orientation and the resulting image dimensions. In landscape mode typical aspect ratio is 2:3 or 3:2 and the camera orientation is horizontal (90 degrees). It lends itself easy to capture expansive vistas – mountains, seashore or a feast spread over a table.
But for Instagram style posts which need 1:1 aspect ratio you may choose the portrait mode.
Using Portrait Mode in iPhone Food Photography
Portrait Mode on the iPhone is designed to create a shallow depth of field blurring the background while keeping the subject sharp. While it’s primarily for portraits of people, it can be a powerful tool in food photography when used carefully.
When to Use Portrait Mode
- To isolate the dish from a busy background.
- To highlight detail, like the texture of a cake or the froth on a cappuccino.
- For close-ups, especially with minimal props.
Use with Caution
- Sometimes Portrait Mode over-blurs edges, especially around utensils, sauces, or garnishes. Watch for unnatural blurring.
- It might miss small details, like steam or translucent elements (e.g., glass or jelly).
Tips for Best Results
- Keep the distance right: Around 1.5 to 2 feet away works best for most dishes.
- Tap to focus: Make sure the iPhone locks focus on the main part of the dish.
- Adjust depth after shooting: In Photos -> Edit -> Depth Control slider (on iPhone XS and later).
- Use plenty of natural light: Helps Portrait Mode detect edges more accurately.
Pro Tip:
If Portrait Mode doesn’t look right, take the same photo in standard Photo mode too . You may prefer it during editing.
The Bokeh Effect in iPhone Food Photography
Bokeh (pronounced boh-kay) refers to the aesthetic blur in the background of a photo. It helps draw the viewer’s eye to the main subject in this case, your delicious food by creating depth and visual separation.

How to Achieve Bokeh with an iPhone
Use Portrait Mode
- iPhones with dual or triple cameras (iPhone 7 Plus and newer) can create a digital bokeh effect using Portrait Mode.
- Tap on the food to focus, and the background will softly blur.
Get Close to the Subject
- The closer your phone is to the food (within focus range), and the farther the background is, the stronger the bokeh.
- Use the 1x lens for a more natural blur (avoid ultra-wide).
Adjust Depth Control
- On iPhones with Depth Control (XS and later), after taking a photo in Portrait Mode:
- Tap Edit > Use the f-stop slider (lower f-stop = more blur).
When to Use Bokeh in Food Photography
- Great for: Single-subject dishes, drinks, desserts, or when shooting in a cluttered environment.
- Avoid when: You want to showcase props or a styled tablescape bokeh might blur those details.
Bonus Tip:
You can also create bokeh effects in editing apps like Snapseed, Lightroom Mobile, or Focos (for more manual control).
Editing Food Photos on Your iPhone: A Quick Guide
Capturing a great shot is only half the storyediting brings your food photos to life by enhancing colors, correcting lighting, and emphasizing details. The best part? You can do it all right on your iPhone with a few taps.
1. Use the Built-in iPhone Photos Editor
The native Photos app offers surprisingly powerful tools:
- Auto-Enhance: Tap the magic wand icon to instantly improve brightness and contrast.
- Exposure & Brightness: Lighten shadows or darken highlights for balance.
- Brilliance & Contrast: Add subtle pop and depth.
- Saturation & Vibrance: Boost color without overdoing it.
- Sharpness: Use lightly to enhance texture (like flaky pastries or sprinkles).
- Vignette: Slight darkening of edges draws attention to the center of your dish.
Tip: Always edit with natural light in mind to preserve the natural feel of your original lighting setup.
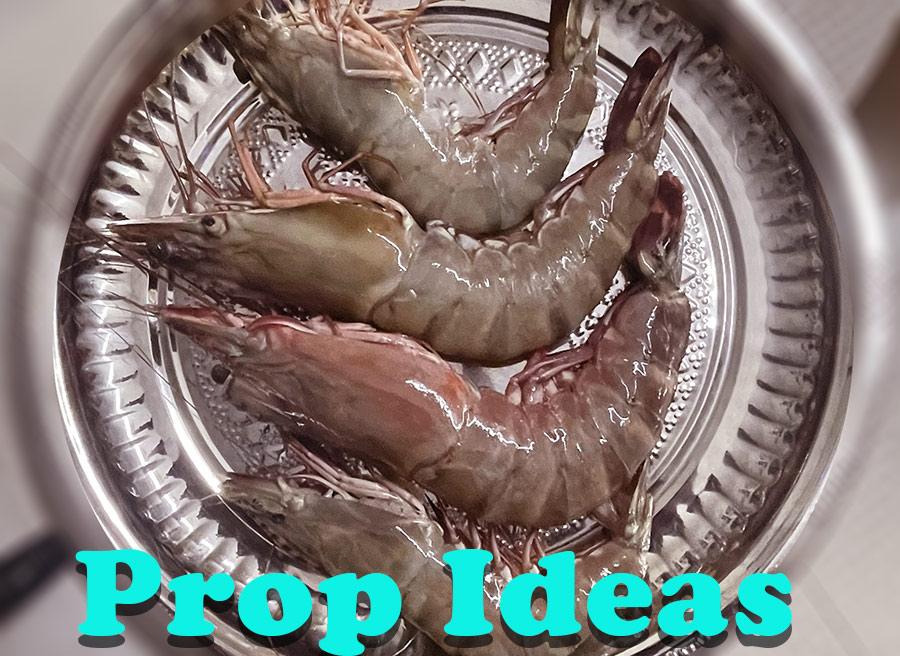
Props & Storytelling in iPhone Food Photography
Great food photography goes beyond just showing what’s on the plate it tells a story. And the secret to storytelling?
The right props. When used thoughtfully, props help set the scene, evoke emotion, and give your food photos personality.
What Are Props in Food Photography?
Props are the items surrounding your dishplates, utensils, napkins, ingredients, cutting boards, glassware, and even hands. They create context and style that make your photos more relatable and visually engaging.
How to Use Props for Better Storytelling
Match the Mood
- Use rustic props (wooden boards, ceramic plates, linen napkins) for homemade or comfort food.
- Choose modern, minimal props (white plates, slate boards, matte cutlery) for clean, upscale dishes.
- Add seasonal elements (like cinnamon sticks, herbs, or flowers) to hint at time and occasion.
Keep It Realistic
- Imagine you’re capturing a moment: someone about to dig in, just finished cooking, or in the middle of serving.
- Use scattered crumbs, drips, or a half-eaten forkful to add a natural, lived-in feel.
Don’t Overcrowd
- Props should support the dish, not overpower it.
- Stick to 2–4 key props that add interest without distraction.
Add Human Touch
- A hand holding a cup, a knife slicing a cake, or fingers sprinkling herbs brings life and movement into the frame.
- It adds scale and relatability, especially on iPhone close-ups.
Prop Ideas to Keep on Hand
| Category | Examples |
|---|---|
| Backgrounds | Wooden boards, linen cloth, marble tiles |
| Dishware | Neutral plates, handmade bowls, vintage spoons |
| Ingredients | Fresh herbs, spices, flour, fruit |
| Textures | Woven napkins, parchment paper, cutting boards |
| Personal Touch | Books, hands, cups, journals |
Photography is a vast subject. In this page I have compressed most of the important points about mobile photography into manageable chunks anyone can use to improve her photography. Bon appétit! Enjoy your meal!