Vinegar has a long history – from the time of Babylonians 5000 BC. Vinegar – derived from the French word – vin aigre – for Sour Wine is a dilute solution of acetic acid. It occurs from a natural fermentation process of alcohol.
Chemical Formula of Vinegar: The major ingredient in vinegar is acetic acid (ethanoic acid) whose chemical formula is CH3COOH
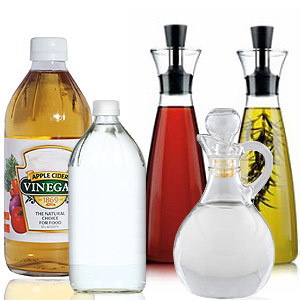
The humble ubiquitous vinegar has hundreds of uses in and around your home. Before we check out all the Vinegar uses, we will say here that not all vinegars are made the same way. Though they all contain acetic acid, the strength of the acid varies from 4 % to 18 % depending upon their origin. The most common Vinegar from grocery stores is Apple Cider Vinegar made from Apples or cider. Apple cider vinegar has a brownish yellow color and it is widely used in health and for general culinary uses.
Vinegar Health Benefits:
There are many vociferous advocates for the various Health benefits of Vinegar. Vinegar is shown to reduce the glycemic index of carbohydrate, reduce cholesterol level, blood sugar levels, triacylglycerol and helps in weight reduction amongst others.
Hippocrates, the father of western medicine prescribed Vinegar for reliving the symptoms of sinus. A drink called as Posca, Vinegar mixed with water and a little of honey was used by the Roman soldiers to ward off infections. At the time of Black Plague, a concoction made of garlic soaked in Vinegar called as Four Thieves Vinegar, was used to protect – 4 thieves from Plague.
1. Apple Cidar Vinegar in Weight Reduction: 1 Tablespoon of Apple Cidar Vinegar mixed with a glass of warm apple juice taken at the time of every meal helps to shed excess body weight.
2. Cholesterol Reduction: One tablespoon mixed with water or any fruit juice once a day on a regular basis has shown to reduce cholesterol levels significantly.
3. Reduction of Blood Pressure: 1 tablespoon of Vinegar and one tablespoon of honey in a glass of water helps to reduce the blood pressure.
4. Diabetic management: 2 tablespoon of Vinegar taken with food helps to reduce the blood glucose levels.
5. Improves Digestion: Vinegar, taken in small quantities (about one tablespoon) along with water aids the digestive process especially during a heavy meal.
6. Control of Flatulence: Some foods like beans and cabbage increase flatulence for some individuals. Vinegar helps to promote better digestion thwarting flatulence in the process.
7. Tenderizing Meat: Vinegar has traditionally been used to tenderize meat. Add one or two tablespoonful of vinegar to marinate tough meat.
8. Control of Urinary Tract infections: Regular intake of Vinegar helps to maintain the right pH balance in the urinary tract which tends to curb UTI.
9. Managing infections: Vinegar’s potent bactericidal ability could be used to fight mild infections.
10. Jelly fish stings: Dousing the stung region in Vinegar helps to prevent the spread of the venom called as nematocyte. Vinegar can be useful for some other insect bites as well.
11. Increase the bioavailability of iron from some vegetables like Spinach: Vinegar added to spinach enhances the absorption of iron.
Vinegar as Beauty Aid:
1. Use Vinegar to control Acne: Cotton ball dipped in a dilute solution of Vinegar helps to reduce the inflammation and the infection.
2. Reduce frizz and add shine to hair: Applying dilute solution of Vinegar on the hair and rinsing afterwards unshackle the frizz and adds shine.
3. Control Oil in oily skin: Equal parts of vinegar mixed with water can be applied on the surface of the skin (avoid sensitive areas) and then rinse with copious water. Acidic Vinegar opens the pores and removes the dirt and oil from the skin.
4. Tighten the skin: Dilute Vinegar helps to peal away the dead surface layer of the skin.
5. Control Body odor: Applying a little of vinegar in your underarms can retard odor causing bacteria.
6. Foot care: Immerse you feet in a shallow tub of warm water mixed with a cup of vinegar for 30 minutes.
7. Controlling Dandruff: Apply vinegar on the scalp. Wash your hair after about 30 minutes.
Vinegar as Green Cleaning Agent:
Vinegar deodorizes refrigerators, ovens and microwave ovens. Keep a small saucer filled with Vinegar inside the refrigerator for a few hours to remove the odor. Clean the inside of ovens and refrigerators and freezers with a solution of Vinegar to kill the bacteria.
Dilute solution of Vinegar can remove stubborn stains and dirt from the ceramic tiles, grouting and glass surfaces – almost any surfaces. Use a weak vinegar solution to clean and remove the dark stain from marble surfaces. Wash with water immediately after cleaning the surfaces.
Vinegar removes glues, stickers and stains from automobile glass and mirrors. Vinegar also tends to ward off insects and germs.
It kills weeds, slugs, insects and flies in the garden and from your pets. It is not harsh on the environment as well.
Vinegar combined with baking soda can be used to declog a drain. Leave the fizzing concoction for an hour before pouring down water.
Clean your DVD/CD with a soft non lint cloth dipped in vinegar. Dry the DVD/CD before playing. Your drive electronics don’t take kindly to water or vinegar.
I have outlined only a few of the possible uses of Vinegar in this blog. If you are going to try the vinegar for any of its health benefits, consult your physician or health care professional. A few hours of research – however meticulous it may be – is no substitute for professional guidance.