While rummaging through our office spares drawer, I found at least a dozen hard drives ranging from a measly 40 GB to 500 GB, all nicely wrapped in their anti-static sleeves. Most of them landed up there when the computers where they were fitted, were upgraded. This meant that these internal hard drives are still in perfect working condition. Only problem is other than the higher capacity 500 GB drives (which are of SATA type) all others belonged to the type with IDE interfaces.
Most of them contained Windows and other licensed software. Other drives were formatted with ext3 file system under Linux. These drives were mothballed for later deactivation and complete formatting. We didn’t find the time to allocate for this mundane activity. Now it was decided that somehow they can be put to good use after making sure that they are still serviceable. May be they could be used as redundant backup drives. Only issue is to find the appropriate interface which can be fitted to a spare computer. We chanced upon a USB to IDE/SATA adapter available from many Online stores for a ridiculously low price.
A few weeks earlier, a hard drive showed signs of failure in one of our computers and it was replaced without much ado. That drive was still within the warranty period and before it could be shipped to the dealer for the warranty claim, it had to be securely wiped clean. We didn’t want to tie up a computer for any of these activities and so this USB to IDE/SATA adapter was tempting.
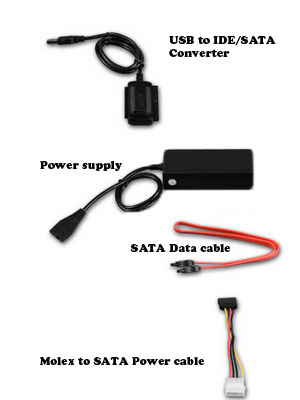
So this adapter was bought and as you can see from the image here, it came with its own power supply which is important as you can connect your hard drive as a stand-alone unit with only a USB cable to connect to the computer.
The same adapter can be used to connect a DVD drive to the Mac Mini and in a hurry can be used to provide additional hard drive for Time Machine for the Mac.
We rigged up the adapter to a Seagate 160 GB hard drive and expected to see a Windows message to the effect that it found a USB device and install suitable drivers. No such message was shown. On touching the drive, the whir of the drive motor could be felt. Out came the cable and we tested the power supply. The 12 V and 5 V rails were spot on even under dummy load conditions. According to the markings on the power supply, it was capable of supplying upto 2 A in 12 V line as well as 2 A in the 5 V line. It is a switch mode power supply and it looked quite up to its role.
So it has to be the driver.
Again in went the cables and still the drive was not officially recognized. But we found an entry of a device here: Control Panel -> Device Manager -> Disk Drives.
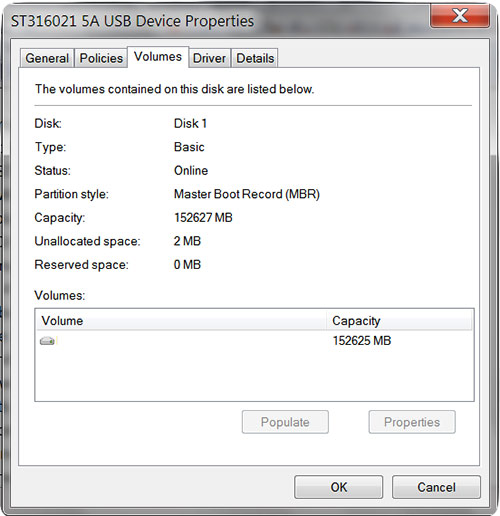
It identified the drive as ST316021 5A USB Device. But it showed the drive as offline. It was time to whip out some command line utility to get the drive online. Windows 7 comes with such a utility called appropriately as ‘diskpart’.
Go to the Windows start and type cmd on the ‘Search programs and files’ area. You will be shown cmd.exe which you right-click and choose ‘Run as administrator’. From the command prompt, type Diskpart.
And then type list disk
It will show all the available disks. If your external disk is shown but marked as ‘Offline’
Issue this command: Select Disk 0
Assuming that the external drive was marked as disk 0
The system will say Disk 0 is the selected disk
Type detail disk
And it will print the details of the disk
To make the disk online:
Type: Online disk
It will say ‘DiskPart successfully onlined the selected disk’.
Now we can see the disk listed in the Disk drives from the control panel. We formatted the drive in NTFS file format so that this drive can be used as a backup drive.
We formatted the drive in Windows 7 and began the process of copying some files. The speed was decent. It showed an average of about 20-25 MB/second.

The drive can be ‘ejected’ like a normal USB drive.
We loaded up all the drives and observed that most drives were quiet and behaved normally while one drive made the dreaded ‘clicking’ sound indicating an impending failure.
Not bad for the cost of less than 10 dollars and a few minutes to come up with putting to use – about a dozen hard drives.
Even Mac Mini recognized the USB drive formatted in NTFS and showed the directories in ‘Finder’. It can read the files without any issue, but of course could not write to the drive.